Content Types in Windows SharePoint Services (WSS) or SharePoint Foundation enables users to define and group meta-information about SharePoint content.
Typical use for Custom Content Types are in scenarios where a certain set of business specific data types need to be defined. For example if there is a business group that handles all policy making in a company they might want ‘New Policy Template’ and ‘Grandfather Policy Template’ to capture various policies in the company. Another example would be ‘Functional Specifications Template’ and ‘Technical Design Template’ for the engineering group. Such templates would mandate whenever a new document of the said type is created it should have a certain set of data. This set can be configured as a content type in SharePoint.
What metadata do Content Types save?
Simply put, Content Type is a set of field definitions. How are they different from standard Lists in SharePoint? Lists are specific to a location, content types are not. Content types in fact represent the blue print or schema definition that can be applied to a List or any other type of library for that matter. Content Types can also be scoped at site level such that they are available to an entire site hierarchy.
How to create Content Types in Sharepoint?
Content Types can be created in multiple ways
1. Through WSS/SharePoint Foundation User Interface
2. Through code using SP object model
3. Defining an xml based on a pre-defined schema and then deploying the xml as a SharePoint feature.
2. Through code using SP object model
3. Defining an xml based on a pre-defined schema and then deploying the xml as a SharePoint feature.
Each of these techniques deserves an article of its own. In this article, we’ll only cover the first technique.
Defining a Content Type using SharePoint Foundation User Interface
In the following example we will define a content type for a Functional Specification Document
Step 1: Log in a site collection administrator or Site Owner
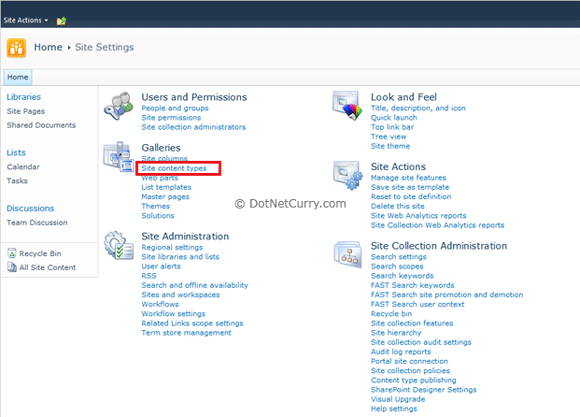
Step 2: Navigate to Site Settings
Step 3: Under Galleries select ‘Site Content Types’
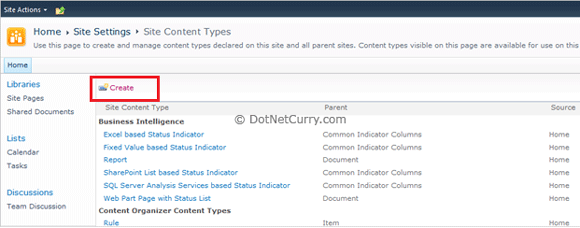
Step 4: In the Content Type Library select ‘Create’
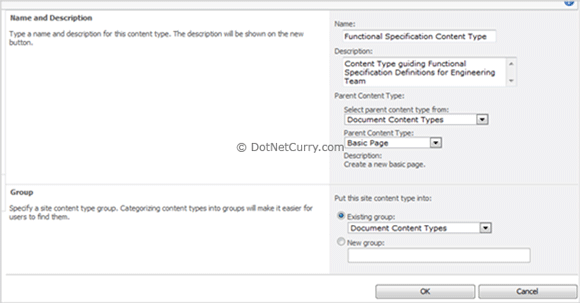
Step 5: Define the Content Type
Step 5: Define the Content Type
a. Name: The name of the content type.
b. Description: Some help text describing what the content type is for.
c. Parent Content Type: Content Types can inherit from existing content types and they are grouped together by a Group Name
i. Parent Content Type from: Select an existing group. Since we are defining a content type that will be used to generate a document we use the ‘Document Content Type’ group
ii. Parent Content Type: We want the content type to be applied when we are adding a new page to a page library in the site, so that each Functional Spec is published as a page.
d. Group: Select under which group our new content type should be categorized. Since it’s template for a Functional Specification Document we’ll categorize it under Document Content Types
e. Click Ok to complete basic content type definition
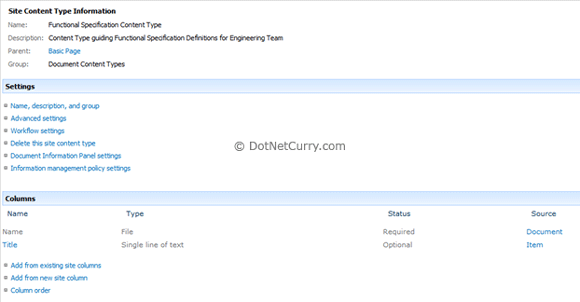
Step 6: Defining Columns
a. By default the content type inherits from the Page content type and gets the Name and Title columns.
b. Now we have two options, either we select columns that already exist or define new columns.
b. Now we have two options, either we select columns that already exist or define new columns.
i. Let’s select some existing columns
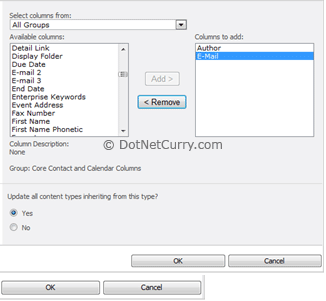
- We select Author and Email columns from the existing set of columns
- While selecting the columns we get the option (Update all content types inheriting from this type?) to force our new columns down the entire content hierarchy. So if there are some other content types that inherit our content type we can force it down to those content types or just keep the changes for this content type.
- Click OK to save changes

- As seen above ‘Author’ and ‘E-mail’ are both set up as Optional columns. But we would rather have these as mandatory. So click on each column to update their settings
- We can edit the Site Level column name too. Remember these are site level columns so changes affect the site. Let’s change the 20th century ‘E-mail’ to a more contemporary ‘Email’.

ii. Add new columns: Let’s add new columns by using the Add from new site column link
1. Major Revision:
a. Column Name: Major Revision
b. Type: Choice
c. Group: Custom Columns
d. Additional Settings:
i. Specify some descriptive text
ii. Give choice values 1-10
iii. Set default choice to 12. Minor Revision:
a. Column Name: Minor Revision
b. Type: Choice
c. Group: Custom Columns
d. Additional Settings:
i. Specify some descriptive text
ii. Give choice values 1-103. Approved By:
a. Column Name: Approved By
b. Type: Person or Group
c. Group: Custom Columns
d. Additional Settings:
i. Description: Name of approver. Needs to be present in the SharePoint User List
ii. Allow multiple Selections: Yes
iii. Allow Selection of: People Only
iv. Choose from: All Users
v. Show Field: Name (with presence)4. Table Of Contents
a. Column Name: Table Of Contents
b. Type: Full HTML content with formatting and constraints for publishing
c. Group: Custom Columns5. Problem Definition: Use same settings as 4b and 4c.6. Functional Requirements: Use same settings as 4b and 4c7. System Requirements: Use same settings as 4b and 4c8. Open Issues: Use same settings as 4b and 4c
c. That’s it, we’ve defined a content type that roughly outlines what data we would like to capture as a part of our Functional Specification Document
Using a Content Type in SharePoint
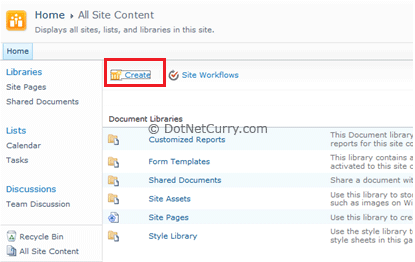
Once we’ve defined the content type we are free to use it site wide. In our case we’ll create a new Page Library just to store functional specs. So navigate to existing ‘Libraries’ and click on ‘Create’.
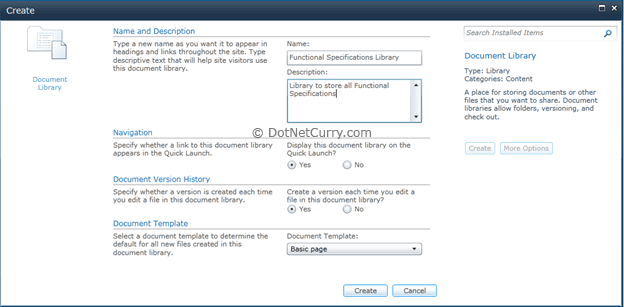
In the popup select ‘Library’ and ‘Document Library’.

Give a Name and click on More Options. Select settings as shown below and click ‘Create’
Now we’ve to tell SharePoint that for this document library use the newly define content type. To do this we need to apply following changes:
Step 1: Go to Site Settings and under Site Administration select Site Libraries and List to get to the list of available libraries.
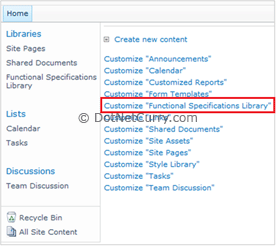
Step 2: Click on ‘Customize “Functional Specifications Library” as shown in the screenshot above, to navigate to following page
Step 2: Click on ‘Customize “Functional Specifications Library” as shown in the screenshot above, to navigate to following page
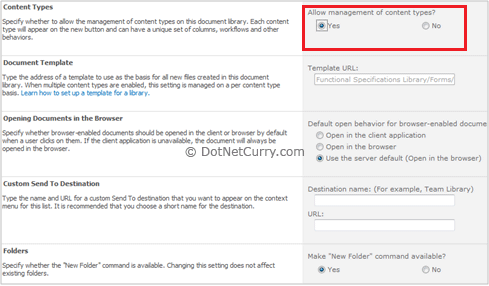
Step 3: Click on Advanced Settings to enable content Management by selecting ‘Yes’ for Allow management of content types
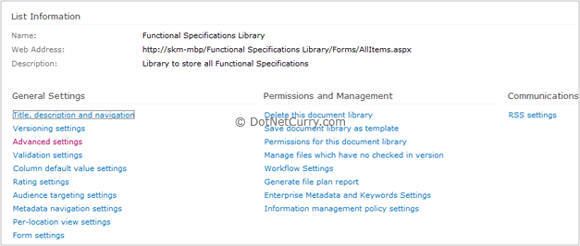
Once we click okay we’ll see a new Content Pane is now visible in the List Information page
Once we click okay we’ll see a new Content Pane is now visible in the List Information page
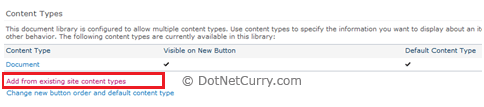
Step 4: Click on ‘Add from existing content types’ link to select our newly created content type
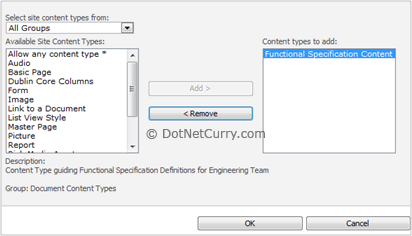
Click Ok to add the content types
Step 5: We don’t want users to use any other content type so we’ll ‘Change new button order and default content type’

To do this we make the Document content type invisible.
That’s it, we are done.
To do this we make the Document content type invisible.
That’s it, we are done.
Creating a new page with our custom content type
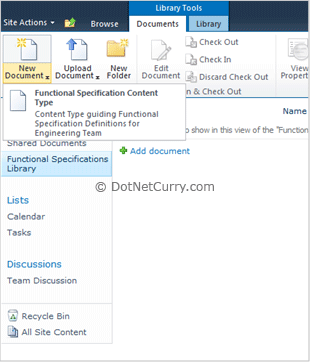
Step 1: Navigate to the page library and select the Documents Ribbon. Then select the New Document pull down menu, you’ll see the newly defined template as the only template to select from
Step 2: Select it and give a name to the new specification doc and click Create

Step 3: SharePoint Foundation will pop up a rich text editor. This editor comes up based on the ‘Layout’ defined. Currently our page library uses the ‘Base Page’ layout. Hence it does not know what fields to show here. How to create custom layouts is a separate topic and out of scope for this article.
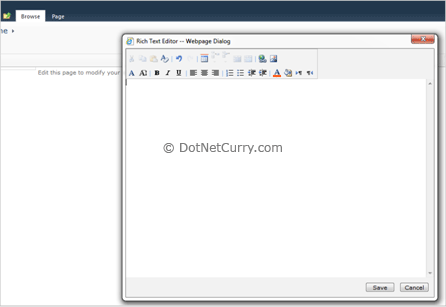
Then how do we see our fields that we added in the custom type? Cancel out of the Rich Text editor and click on the Page ribbon tab.
Then how do we see our fields that we added in the custom type? Cancel out of the Rich Text editor and click on the Page ribbon tab.
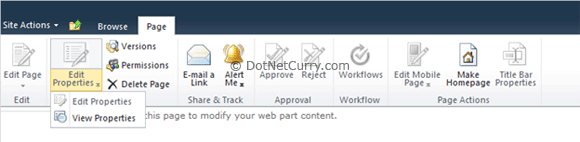
Step 4: From Edit Properties pull down menu, select View Properties.
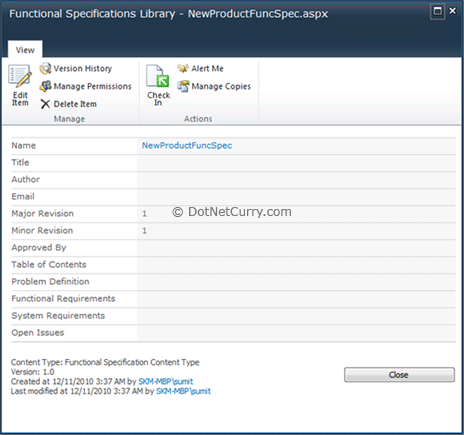
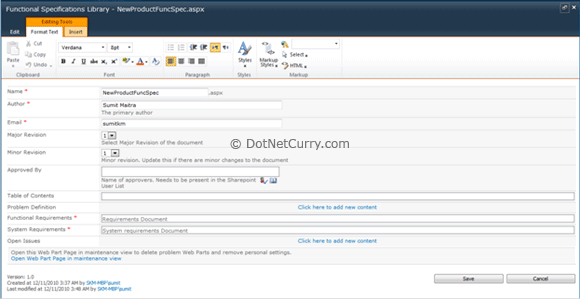
Step 5: Now you can see all the columns we defined for our content type
Step 6: Expand the popup to fill screen and click on Edit Properties
Step 7: Save changes and Check in. We are done.
Conclusion
We saw the steps required to setup a custom content types in SharePoint. This functionality is available in basic WSS 3.0 as well as SharePoint Foundation in other words it comes with your Windows Server license.
Custom Content Types gives you flexibility to define columns schemas independent of location.
This was a basic introduction. We can do a lot more with Content types and all the options that we did not use above.
What Next?
In subsequent articles I’ll be explaining how to make our Functional Specification ‘Page’ actually show the data that we entered through the content type. Then we don’t have to resort to ‘Edit Properties’ to add/update content values. This is achieved through another SharePoint feature – Layouts. We’ll also see how we can setup workflows for approval of our Functional Specification Document as well.
References
http://msdn.microsoft.com/en-us/library/ms472236(v=office.12).aspxhttp://www.dotnetcurry.com/ShowArticle.aspx?ID=620
No comments:
Post a Comment